 Folk art, antiques, and outsider art
How to Make Tramp Art
From Hobo and Tramp Art Carving: an authentic American folk traditionBy Adolph Vandertie with Patrick Spielman.
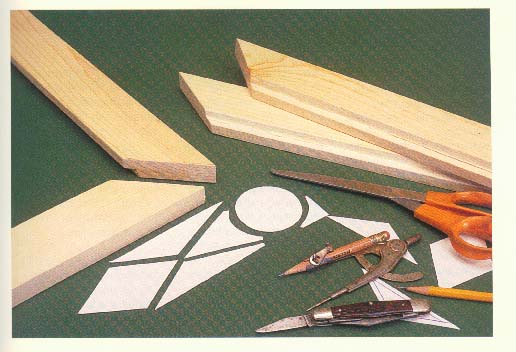
The material from this book is used on our site by permission of Sterling Publishing Co., Inc. We wish to express our thanks to them for their kindness. In addition to the following text, we also have a picture of some of the tools used for making tramp art, and some images which are representative of "tramp art".
[Tramp art is started by] cutting a series of angular notches that approximately equal the thickness of the wood. The exact spacing and style of notching should be developed by the individual. Some may prefer fewer notches with wider spacing and others may prefer to position the notches closer together see Diagram I on the opposite page [not shown].
Each person created their own designs, often incorporating circles, squares, triangles, ovals, hearts, or a combination of geometric shapes. There were no hard and fast rules. Material thicknesses and spacing of notches varied with the individual. The size and placement of notches were not measured, but cut by "eye" and became remarkably uniform from layer to layer.
It is best to cover one layer on one surface completely, cutting each part to fit while at the same time checking the design layout before proceeding on to the next layer. Patterns made of cardboard help in checking the design layout as well as serving as actual patterns for cutting the wood pieces, ... and for staggering the joints within successive layers.
Glues were, as a rule, not used in Hobo or Tramp art projects because the granular animal glues available at the time required heating pots for use. Tramps and hobos did not have access to this type of equipment. Consequently, everything was nailed together with shoemaker's nails which were small tacks. Nails were often left exposed in the top layers. Caution.- If you use glues, remember to be careful because the glue will seal the wood and it will not take stain or finishes uniformly. Areas where glue has squeezed out and spotted surfaces resulting from glue on your fingers will create a very splotchy and unattractive finish.
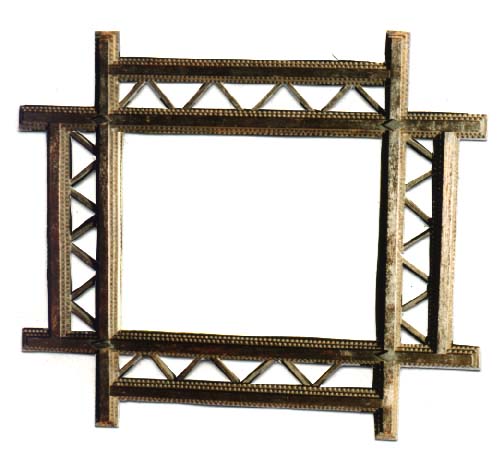
Most early Tramp art was brush-coated with several thick applications of a varnish stain. Some artists used oil stains. This picture frame project features a combination of stained pieces (inside and outside edges) and natural pieces. (Actually, it was coated with a 50-50 mixture of linseed oil and turpentine.)
Hobo art carvings were by and large left unfinished. The surfaces were seldom sanded. If a smooth surface was desired, knife marks were smoothed down with the edge of a broken piece of glass that served as a very effective scraping tool.
If trying to replicate a covered cigar box, the most popular size was 2 1/2" x 6" x 8 1/2". However, some boxes were up to 17" in length. The cigar boxes were made from 1/4" to 3/8" thick material. Very large frames and some other large boxes were made simply by butting smaller or shorter pieces end to end.
Hobo and Tramp Art Carving is no longer in print. You may be able to find a copy at a used bookstore or on eBay.
Here are some images of representative work:
A group of several pieces ... A frame ... A table ... A box
For more information on hobo and tramp art please see:
1. A short article on tramp art.
2. The history of tramp art.
3.How to carve a chain and whimsey.
4.The history of hobo art.
Tramp art for sale: Tramp Art
Whimsey carvings for sale: Page 1 Page 2
![]()
Home Page | Site Guide | Top of page | Inventory | Ordering | Contents | Search
What's New | Using the Site | Resources | Featured Sale | Contact Us
![]()